Installation of the Smart Oil Gauge Duo should only be performed by a qualified installer. If at any point, you have questions about the installation, please contact us at 203-456-1499 option 3.
Installing the Smart Oil Gauge Duo on most heating oil tanks is very straightforward. But, it might require you to have a little bit of muscle, pipe dope, and your trusty pipe wrench to get the job done. However, there are different sizes of tanks that the gauge cannot be installed onto. The installation is very similar to installing the standard Smart Oil Gauge, but there a few differences that should be mentioned. To start off, you’ll need the following:
· Pipe Dope
· Pipe Wrench
· A tank with at least a 1.5” NPT fitting
Before you install: You should setup the Smart Oil Gauge Duo. While you can take the interior out of the Duo for setup and troubleshooting, it might be easier to setup the gauge before installing it to ensure that it is functioning correctly.
If you’re having trouble configuring the Smart Oil Gauge, you can take a look at the troubleshooting section. You can also contact us at 203-456-1499 option 3 from 8am-5pm EST, Monday through Friday.
Installing on a Standard Steel Tank
Once you’ve connected the gauge to the WIFI, you can install it! If you have a standard steel tank, you should be able to install the gauge with no issue! Most standard Granby tanks have a 2” NPT fitting. However, some of them might have a different sized fitting. 1.25” and 1.5” NPT fittings are semi-common as well. But, the Duo cannot be used with a 1.25” fitting. Even an adapter for a 1.25” fitting cannot work with the Duo. This is because the Duo itself is too big for an adapter of this fitting size.
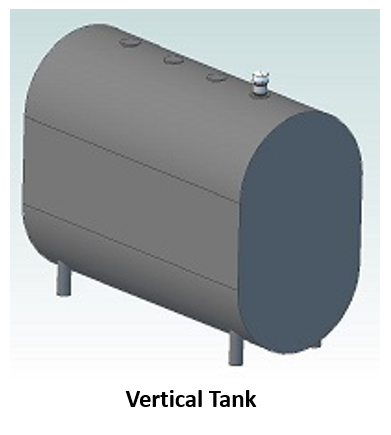
These tanks will normally have four fittings on the top. One is used for a fill line, once for a vent pipe, one for a float gauge, and an extra opening. The extra opening can be used to install the Smart Oil Gauge if you still wish to use your float gauge!


Steps for Installation:
1. First, you have to find the extra opening to install the Smart Oil Gauge onto. If you don’t have an extra opening, you will need to remove the float gauge and install the gauge where the float once was. When removing the float, be sure to have some paper towels, rubber gloves, and a trash bag handy, because it will get messy!
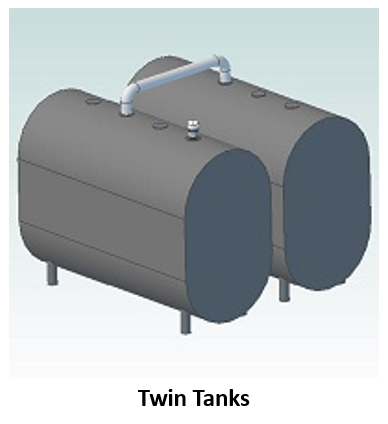
Twin/Dual Tanks: If you are installing on a setup that has two tanks with one vent and one fill line, then you must be sure to install the gauge onto the tank with the vent pipe. If you install the gauge onto the tank with the fill pipe, it will get damaged due to the pressure. If your gauge receives damage from being improperly installed, the warranty will be voided.
Tip: If you can’t get the plug to come out easily, you might want to consider using some penetrating oil like “Liquid Wrench” to loosen up the plug. If the plug is still tight and not coming loose, you might need to get an extension for your pipe wrench to increase your leverage.
2. Once you’ve managed to remove the plug, apply some pipe dope onto the threads of the Smart Oil Gauge. You should then be able to hand tighten the gauge down until you can’t tighten it anymore. At this point, you’ll need to use the pipe wrench. You’ll want to put the teeth of the pipe wrench on the METAL BODY of the device. DO NOT put the pipe wrench on the threads of the gauge. It’s ok to put teeth marks and scratches on it. That is what the metal body is designed for. You should have 5-6 threads showing on the gauge once it’s been installed onto the tank. The gauge’s threads are tapered, so there will never be no threads showing on the gauge.
Tip: It’s very important to NOT use Teflon tape on the bottom threads of your oil tank. Teflon tape is not compatible with heating oil and it can break down over time and end up in your tank causing issues to your heating oil system.
3. The gauge will usually take it’s first reading about an hour after it’s initial configuration. The gauge’s default upload interval is every four hours. So after four hours have gone by, feel free to check your app to see what the gauge is reading, and you should be all set to go!
You can watch our step-by-step process on Steel Tank installation by checking out our Steel Tank Installation Guide.
Steel Tanks with 1.5” NPT Fittings
Some older tanks don’t have a standard 2” NPT fitting. If your fitting measures around 1.9” across, then you will most likely have a 1.5” NPT fitting. It’s important to note that the Duo WILL NOT work with a regular off-the-shelf adapter. The gauge’s signal is sent in a cone shape which will cause it to always read full if not used with one of our adapters. You will need to use one of our adapters. They offer a special guide cone that will help the sensor send the signal properly.
1. Apply the pipe dope to the 1.5” adapter and hand-tighten it onto the tank. Then, you can use a pipe wrench to tighten it down the rest of the way.
2. After you’ve installed the adapter onto the tank, be sure to take the interior parts of the gauge out. The interiors should look like a little trash can structure. Then, slide the guide cone in through the piping and put the interior parts back in the gauge.
3. Then, you can HAND TIGHTEN the gauge onto the adapter. This will allow the two to connect and give the gauge the ability to send the signal properly. The interior will have a gasket that provides a seal for the Duo. DO NOT apply Teflon tape to the bottom threads of the fitting if you are using an adapter. This will cause the gauge to read inaccurately.
4. Lastly, you should go into the app and set a 1” offset. This will help your gauge read more accurately after the adapter has been installed onto the tank since it will be raised up 1”. You can access this Configure>Tank Style>Advanced>Sensor Offset and enter the value of 1.0. After you’ve set the offset, you’ll be all good to go!
Installing on a Roth Double-Wall Tank
On Roth double-wall tanks, the feed lines will tend to be on the top of the tank. So usually there isn’t an open port to install the gauge onto. Due to this, you will need to remove the existing gauge and install the Duo in that port. Similar to what was mentioned above, be sure to have gloves and a trash bag ready so that you can properly uninstall the existing gauge.
Important: Like the standard Smart Oil Gauge, the Duo is not compatible with Roth 1500L tanks. This is because the internal support baffle will prevent the gauge from reading past half a tank. This baffle will help the tank from bowing out when it gets full. The gauge’s ultrasonic sensor will see this baffle and won’t be able to read past it.


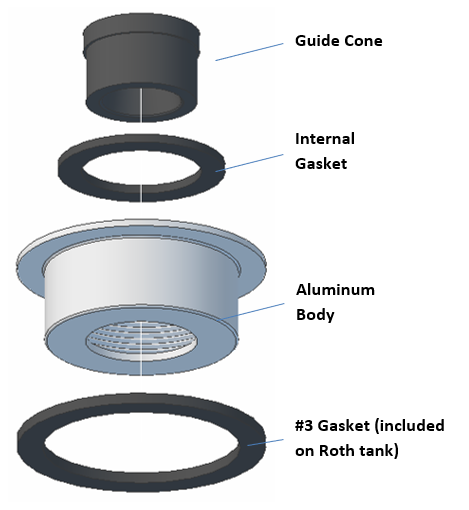
1. Using the below photos, you’ll see how the adapter is constructed. You will first need to remove the existing float gauge, whilst leaving the #3 gasket in place.
2. Then, take the trash-can like interior structure out of the pipe and slide the gauge’s guide cone into the piping before installing the gauge back onto the tank. You will then need to put the interior parts back in the silver piping.
3. After putting the guide cone into the piping, you can install the gauge onto the adapter by hand-tightening it. DO NOT use Teflon Tape or pipe dope on the Smart Oil Gauge. This will interfere with the gauge’s ability to read properly. The gasket in the adapter will provide a seal for the sensor to work properly.
4. You can now place the #3 gasket onto the fitting as shown in the below photos. You’ll need to unscrew the Duo’s cap to slide the nut back onto the fitting assembly to ensure it’s stable. After this, your Duo is all set on the Roth tank!
You can watch our step-by-step process on Roth installation by checking out our Roth Tank Installation Guide.


